hi, guys! i'm kristen from "kfd designs." i specialize in decorative painting, working with everything from walls to furniture. i've recently been asked LOTS of questions about painting furniture, so when jen asked me to do a guest post for her, i knew that'd be the perfect thing to share some of my "knowledge" on!
____
when i buy a piece of furniture, i don't generally worry about the surface that i am dealing with, because you can rough almost anything up enough to make it accept paint! depending on how slick the surface is, i will use a different grit sandpaper to make my surface rough and ready to accept primer. if the surface is very slick, i use a lower grit sandpaper, if it is no- so-slick, i just do a light sanding. i have a black and decker mouse sander that i use almost daily!
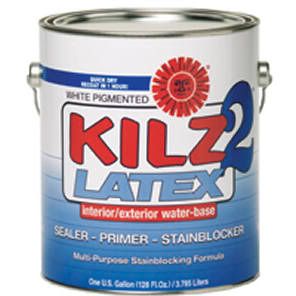
after sanding, it's great to use a primer. i really like kilz latex primer for most of my priming jobs, because not only does it have excellent coverage, but it also provides a really gritty surface for the top coats to adhere to. i just apply it with a chip brush, or any brush i have sitting around - applying primer requires no skill, you just slap it on!
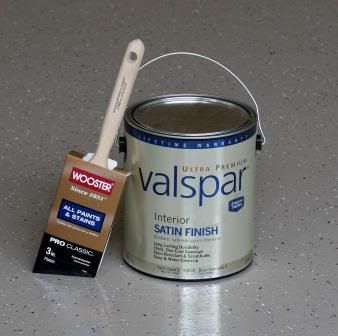
after my primer coat has dried (i usually let it dry 24 hours), i am ready to do the base-coat. i prefer using a semi-gloss or gloss paint, and i don't really have a brand loyalty! if i have a choice, i usually buy valspar brand from lowe's, but i'm not very picky. valspar, to me, is the best consistency for paint (even compared to "nicer" brands like benjamin moore and sherwin williams) - not too thick, and not too thin. plus, the price is right at about $20/gallon. another helpful hint: if you are painting a small item, sometimes you can get away with buying one of their "sample" size paint jars instead of a whole quart of paint!
maybe i do have brand loyalty? heh...
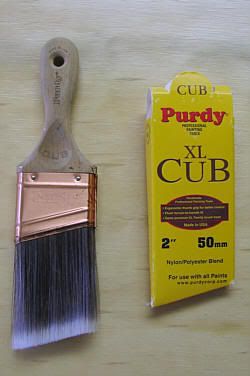
next: actually painting your furniture! i really, really, really LOVE purdy brushes. they're expensive, but trust me - they're worth it. i think the big differences in seeing something that is "professionally" painted versus something that is done "DIY" are brush strokes and roller lines. purdy brushes have thin bristles and are arranged in a way that helps you apply the paint easier, which, in turn, creates fewer brush strokes and easier application. my favorite purdy brush is my "cub" brush:
i've probably bought about 8 of these brushes since i began. they're the best!
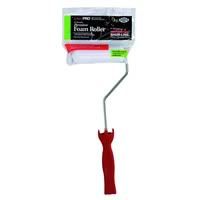
also, i like to use a foam furniture roller, which looks like this:
they make furniture rollers in different lengths - you can buy one that is the right size for your project. the foam rollers create a flat surface that is perfect for the application of paint onto a flat furniture plane. i start out my furniture-painting projects just like a wall-painting project - i do the "cut in" lines with my purdy cub brush (the areas at the corners, edges and hard to reach areas), then roll paint onto the flat surfaces with my furniture roller. the key to not having "roller lines" is to just apply your paint smoothly, and evenly and most importantly: DO NOT BARE DOWN WITH YOUR ROLLER. if you bare down too hard, it creates those little paint lines from the ends, which results in a bumpy paint-job! you always want to follow the grain of the wood when you are painting furniture (even if it's faux wood). i usually do about 3 coats of paint for even coverage.
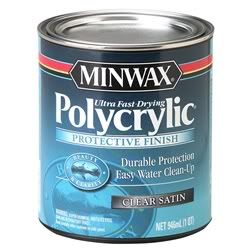
after your base-coat is dry (again, wait about 24 hours), you can do the topcoat of polyurethane. i like minwax's water-based latex "satin" finish poly.
i prefer satin over gloss (because it is easier to apply), but sometimes i do use a gloss to achieve a shinier look. i apply the polyurethane in the same way that i apply the paint (using my purdy brush and a foam roller), but you always have to go back and double-check for drips when you are painting with poly! it's easy to forget to be careful (since it's clear!) when you are painting polyurethane on, but it's very thin and has a tendency to drip. just go back when you are finished to make sure it's not drippy! i do 2 coats of polyurethane as well.
all in all, i tell clients that the longer you wait, the better "cured" your furniture is going to be. when you are applying this much paint, you are going to have to wait a little while for it to fully dry. handle your furniture carefully for about a week, and then continue to be gentle with it for about a month after you paint it!
_____
i hope my tutorial was helpful - i know there are a million questions that are probably unanswered, but thankfully there are lots of youtube and online tutorials that are quite handy for furniture painting, so if i didn't answer something, hopefully you will be able to find it there. and of course, i think the more experience you get, the better things will go, so don't be scared to grab a paint brush and just start! you will learn as you go, and it's always a fun process! good luck!

5 comments:
Oooh...I love painting! Anything!
Thanks for the tips! Now I want to go paint something!
I know, I'm itching to paint everything in sight!
i need to know more about painting and this was so helpful! we are all about painting old furniture around here and have learned a little... but always the hard way! haha
anyway, i wanted to really come over here and thank you for what you said on my blog. i was nervous in posting it, but just couldn't not post it... does that make sense? :) it's nice to feel supported. thank you.
mermaid friend...I know what you mean. And I'm really glad you did post. It made ME feel more supported!
Post a Comment